If you’re someone who’s thought about designing your own garments for some time, there’s no better time to get started than now.
Embroidery is a wonderful way to add a personal touch to clothing, turning simple garments into unique, custom pieces. Whether you’re a beginner or looking to expand your crafting skills, here’s a guide on what you need to start clothing embroidery.
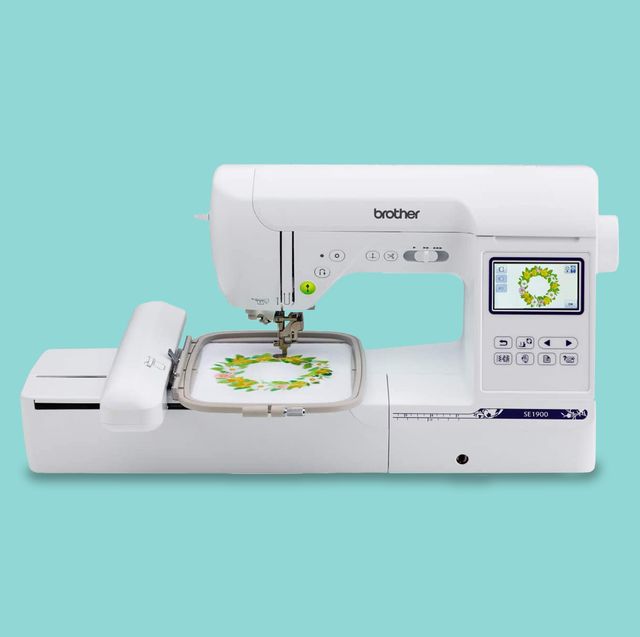
1. Embroidery machine or hand embroidery supplies
Embroidery machine:
- Machine: For faster and more precise designs, an embroidery machine is a great investment. Popular models include Brother SE600, Janome Memory Craft, and Singer Futura.
- Hoops: These hold your fabric taut while the machine stitches. Ensure the hoop size matches your machine.
- Stabilisers: These are essential to keep your fabric from shifting and to ensure clean stitching. Types include tear-away, cut-away, and water-soluble stabilisers.
Hand embroidery:
- Embroidery needles: Choose needles that are appropriate for the thickness of your fabric and thread.
- Hoops: Wooden or plastic hoops keep your fabric tight and easier to stitch.
- Fabric: You can use a variety of fabrics, but cotton and linen are great for beginners.
2. Threads
- Embroidery thread: High-quality embroidery thread is crucial for vibrant, durable designs. Popular brands include DMC, Madeira, and Coats & Clark.
- Bobbin thread: For machine embroidery, you’ll need bobbin thread, which is lighter than regular embroidery thread and used for the underside of your stitches.
3. Fabric
Choose fabrics suitable for embroidery:
- Cotton: Easy to work with and versatile.
- Linen: Ideal for hand embroidery due to its tight weave.
- Denim: Great for adding designs to jeans and jackets.
- Knits: Requires stabilisers to prevent stretching.
4. Patterns and designs
Pre-made designs: You can purchase or download designs from various websites. Some embroidery machines come with built-in designs.
Custom designs: If you have an embroidery machine, you can create custom designs using embroidery software like Brother PE-Design, Wilcom, or Hatch.
5. Marking tools
Water-soluble pens: These are used to draw designs on your fabric. They disappear with water, leaving no trace on your finished piece.
Chalk pencils: Useful for marking on darker fabrics.
6. Scissors and cutting tools
Embroidery scissors: Small, sharp scissors are essential for trimming threads close to the fabric without damaging it.
Fabric scissors: Use these for cutting your fabric to size.
7. Stabilisers
Tear-away stabiliser: Suitable for light to medium-weight fabrics, it’s easy to remove after stitching.
Cut-away stabiliser: Best for heavier fabrics or designs with dense stitching. It provides strong support but requires cutting away excess after stitching.
Water-soluble stabiliser: Ideal for delicate fabrics, where you don’t want any stabiliser residue left behind.
8. Embroidery software
For machine embroidery, software helps you create and edit designs:
- Basic software: Lets you resize and combine designs.
- Advanced software: Offers digitising capabilities to convert images into embroidery patterns.
9. Practice fabric and test swatches
Always practice on a piece of fabric similar to your final project. This helps you test the design, tension, and fabric stability.
10. Additional supplies
Pins and clips: Hold your fabric in place.
Seam ripper: Useful for correcting mistakes.
Iron and ironing board: Press your fabric before and after embroidery to remove wrinkles and set stitches.
Getting started
- Choose your project: Start with something simple, like a small design on a handkerchief or a patch on a t-shirt.
- Prepare your fabric: Wash and iron your fabric to pre-shrink it and remove any wrinkles.
- Mark your design: Use your marking tools to outline where you’ll embroider.
- Hoop your fabric: Place the fabric and stabiliser in the hoop, ensuring it’s tight and smooth.
- Stitch your design: Follow your pattern, whether by hand or machine. Take your time to ensure clean, even stitches.
- Finish up: Remove the hoop, trim any loose threads, and remove the stabiliser according to its type. Press the fabric again to set your stitches.
Embroidery is a rewarding craft that lets you personalise clothing with intricate designs and patterns. With the right tools and supplies, you can create beautiful, custom-embroidered pieces. Start with simple projects, practice regularly, and soon you’ll be able to tackle more complex designs with confidence. Happy embroidering!

