Aperture, depth of field, composition – what does it all mean? When it comes to photography, many beginners are put off by the complex terminology. But, we’re here to break down that barrier and explain the various terms.
A beginner photographer will spend hours upon hours scrolling the internet trying to figure out what an f-stop is and why it’s so important. Instead, they should be out shooting. Unfortunately, or fortunately depending on how you view it, there is no right or wrong within photography. It is all trial and error, and it will take mistake to find your niche.
However, we have put together a list of terminology you’ll see popping up in those photography books, or on photography forums. We’ve explained them simply, so you know exactly what they do. Next time you take your camera out, you can play around with your settings and see exactly how one small alteration can change your images massively.
Aperture
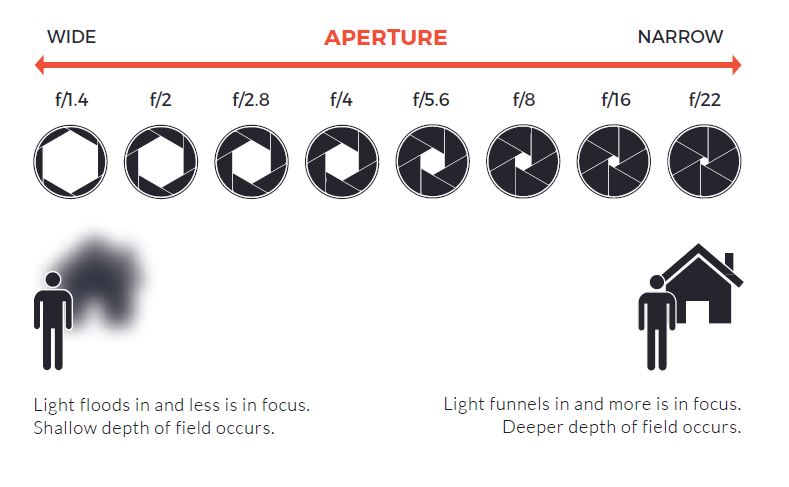
Aperture is one of the first terms you need to learn. It is the size of the lens opening. Your lens is essentially a window which allows light into your camera. Add curtains to your window and depending on how much you open them, will depend on how much light they allow in. A wide aperture will allow more light into your camera than a small aperture.
This is where it can get confusing because aperture is measured in f-stops. The larger the f-stop the smaller the opening. Seems backwards, right? An f-stop like f/1.8 allows a lot of light into your camera as it is a wide opening. Whereas f/22 will only allow a small amount of light in as it’s a narrow window. Aperture determines exposure and how light or dark the image is.
Exposure
Let’s follow directly on with exposure as the two are linked. Exposure refers to how dark or light an image is. An image is created through either camera film, or a camera sensor being exposed to light. This is where the term exposure comes from. Any dark images where you can hardly make out what’s going on; they’re underexposed.
Likewise, images that appear too bright, often a lot of white light will be visible; these are overexposed. Think of an image where you can’t make someone out, they look like a ghost because of the brightness – this will be overexposed as too much light got to the sensor. Exposure is connected to aperture, shutter speed and ISO.
ISO
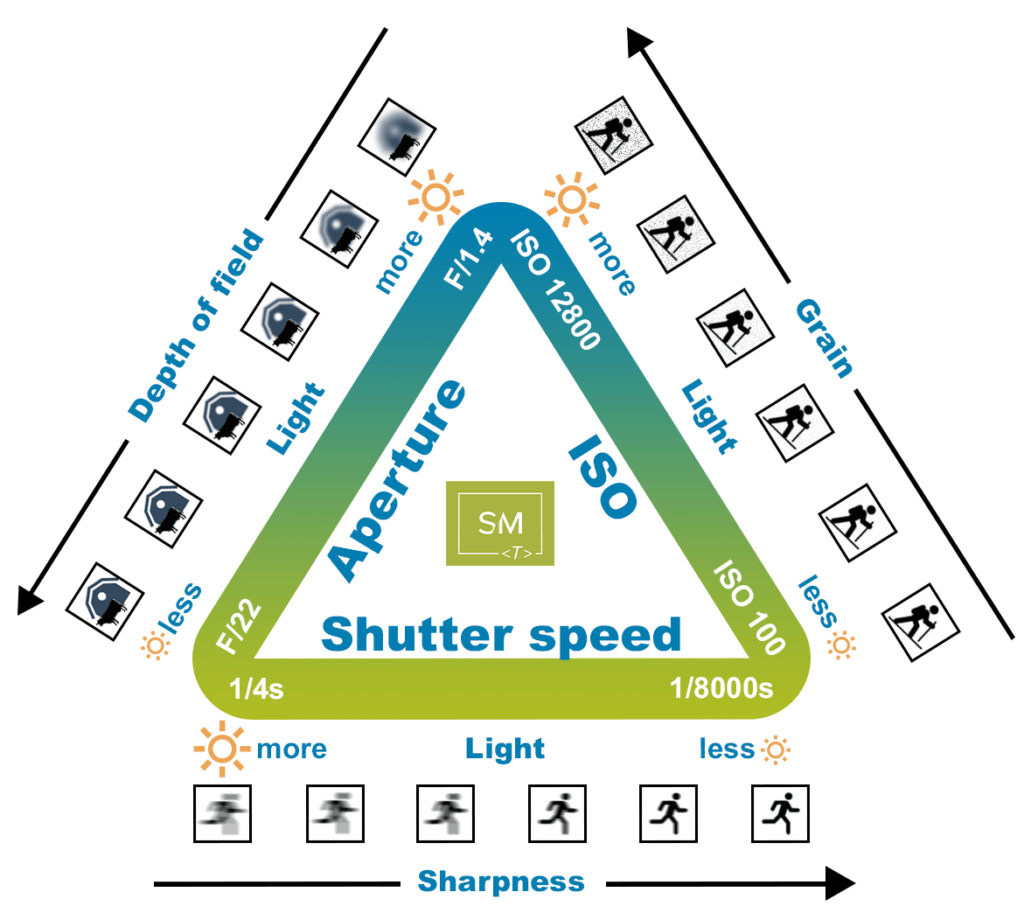
ISO refers to how sensitive your camera is to light. An ISO of 100 would mean your camera isn’t sensitive. The higher the ISO, the more sensitive your camera is. This one makes sense; as numbers go up, so does the sensitivity. It’s opposite to f-stops in this sense. On a bright sunny day you might only need a lower ISO because you have a lot of light.
Shooting in low lighting situations will require a higher ISO, something along the lines of 3200 potentially. This is because your camera must be extra sensitive to light to pick up on any lighting within your image. Otherwise, you’ll have a result which is too dark to depict anything in the image. Images shot in a high ISO can be grainy, so it’s tricky finding the balance.
Shutter speed
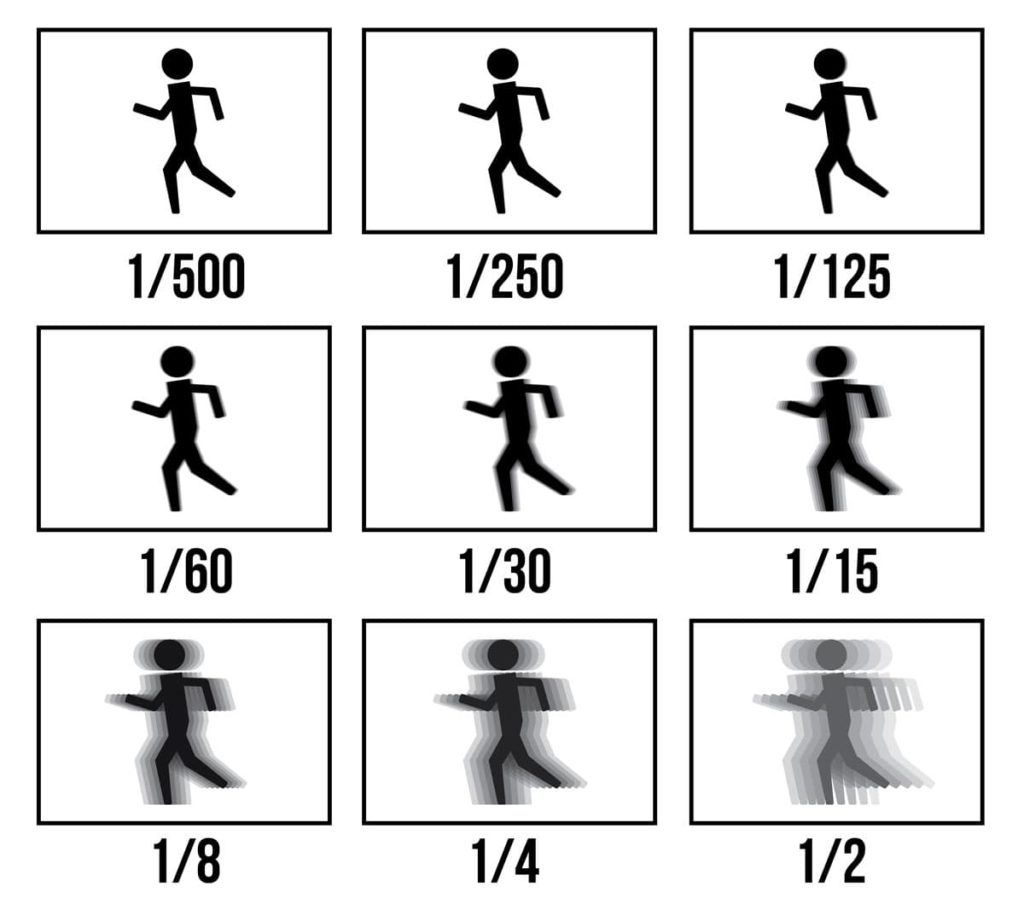
To go along with the previous points, we’re now onto shutter speed which goes hand in hand. A shutter speed is the part of your camera that opens and closes. It allows light in and takes the photograph which passes onto your camera sensor. You’ll see timings written in seconds or fractions of a second. For example 1/200 or 1″.
The symbol ” is used to show a whole second. The longer the shutter is open, the more light that will be allowed in. So, in low lighting situations, you’ll want to have the shutter open for longer. Whereas, on a bright day, you won’t need it to stay open for long at all. Anything that moves while your shutter is open will cause a blur. So, tripods are extremely helpful.
Depth of field

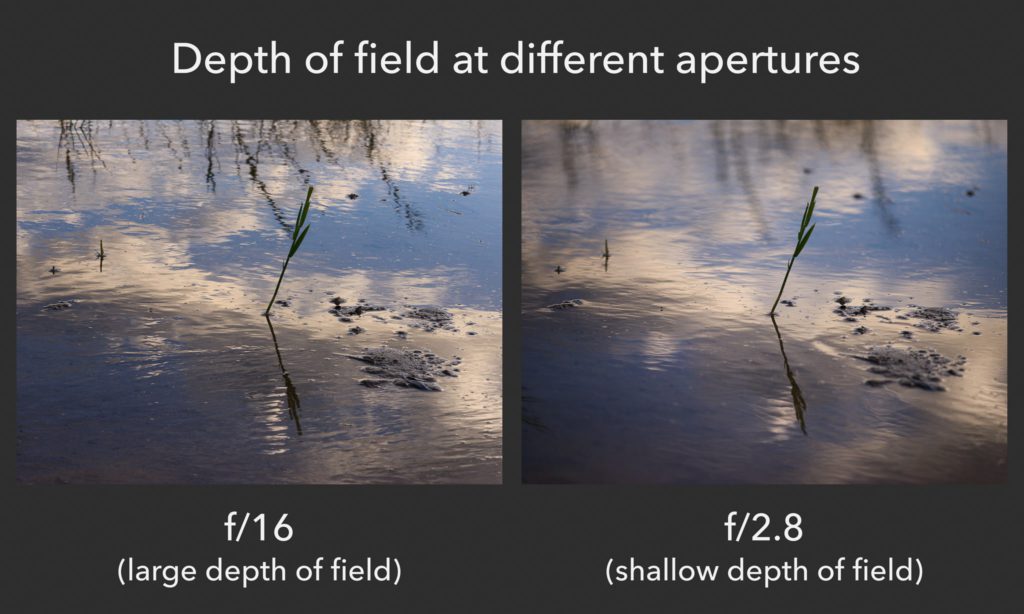
Depth of field refers to image focus. Where you see people using Portrait modes on smartphones and the background is blurred while the subject is in focus – this is depth of field. The camera will focus on one distance, anything behind that distance will become blurred. This is depth of field. Portraits will have a shallow depth of field.
A shallow depth of field is applied when a subject is in focus but the background, things around them are not. However, landscape images will have a large depth of field as the whole image is in focus because you want every detail to be sharp. All images have a depth of field, but you can play around with your settings to find the one that works for you.
Focal length
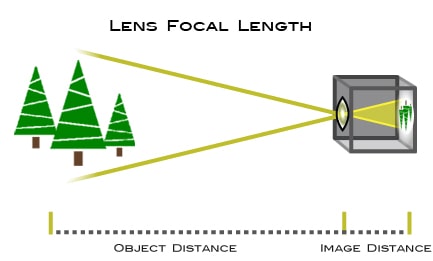
Focal length refers to the distance between the lens and the image. This distance is in millimetres, and it is measured from the end of the lens and the image that is formed onto the camera sensor, or film. The angle of view refers to how much of what is being shot will actually be captured. This is informed by the focal length.
For example, having a whole field in front of you does not mean all of it will appear in your image. Only what you can see through your viewfinder will and this is based upon your focal length (how zoomed in you are). A 35mm lens will be closer to the subject (more zoomed in) than a lens that is 18mm. The higher the number, the more zoomed in.
Viewfinder

It is exactly what it sounds like. It finds the view. The viewfinder is the hole you look through at the top of the camera. It connects to the camera lens. Everything you see through the viewfinder is then captured by the lens. This is why, if your lens cap is still on the camera, you won’t be able to see anything through the viewfinder.
Some cameras may not have a viewfinder. Instead, they just use the screen. This is more common in point and shoot cameras that don’t allow you to interchange lenses. However, a lot of DSLR cameras and mirrorless cameras will have a viewfinder. They help with the accuracy because it blocks out everything else around you.
File format
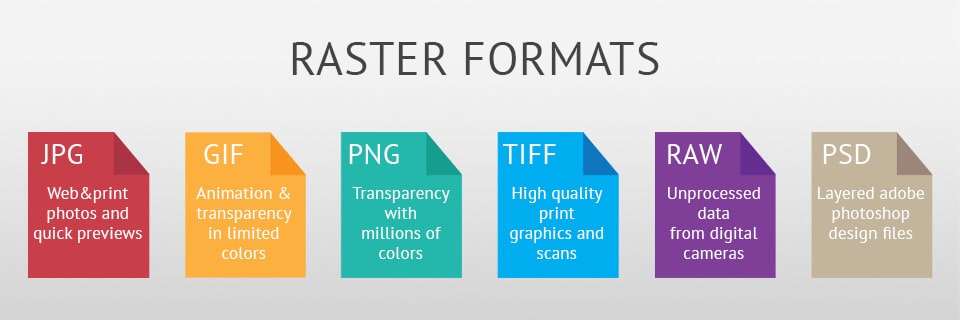
Your file format is how your camera records your images. It’s important to know, once shot, you can’t typically change this. Unless of course, you shoot in RAW. If you shoot in JPEG you cannot upgrade your files to be RAW files. Instead, you will be able to shrink them to smaller file sizes and formats. You cannot enlarge.
You can only decrease file sizes. JPG are more than enough for most photographers. Especially those who are beginners. However, as you get more advanced you might want to work with larger file sizes and formats because these can be blown up without losing any details. JPGS can only be the size they are, enlarging them might decrease the quality.
RAW
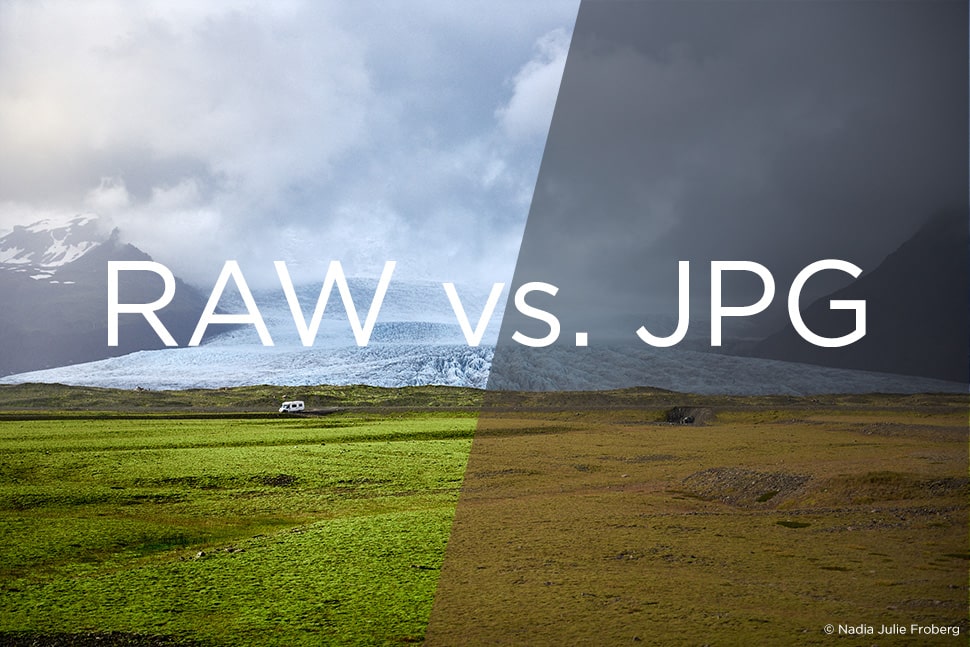
Following on from the previous point, RAW files are the largest file type. They offer a lot more control over your images. Professional photographers will always shoot in RAW. Often, their camera will be set up to shoot in both RAW and JPEG so they have two versions of the same image. This allows them to work with the file type needed for each project.
RAW images can be blown up to huge sizes without any details being lost. They won’t become pixalated or blurry. They retain all tiny details however, they do require special software to open the files. You’ll need something like Photoshop to be able to open and edit RAW files. The quality overall is so much better.
White balance

When your eyes see a new light sources, they adapt to it. When you go outside on a bright day, and then come in and sit in a dark room – your eyes quickly adapt. The same goes for colours. Our eyes and brains work really well together. However, sometimes you might take an image that looks like it has a yellow hue, or perhaps a blue tint to it.
This is because your camera doesn’t work the same as your eyes. Your images might appear the wrong colour and this comes down to your white balance. Changing the white balance in your settings will alter the colours. You can use the automatic settings but they aren’t always accurate. You could choose presets like shooting in sunshine, or you can manually set it.
Hot shoe
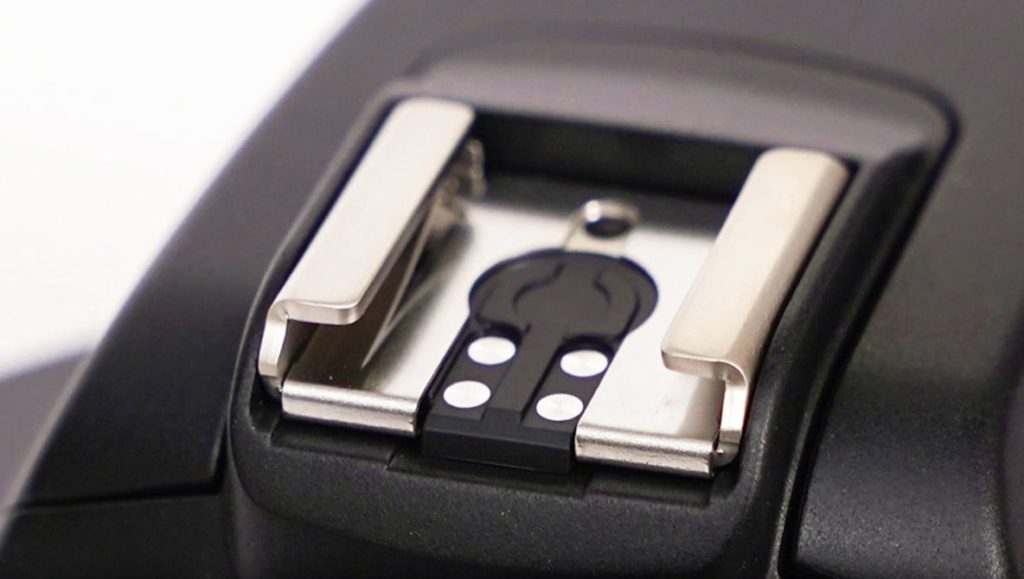
It’s a simple part of the camera, but if you don’t know what it is, you’ll miss out on a lot of accessories. A hot shoe is the slot at the top of a camera. It’s usually grey and made from metal. It looks like something slots into the section. This is because it does. Accessories slot into the hot shoe and you can secure them by tightening the screw
You’ll typically put a flash into the hot shoe. Your flash is also known as a flash gun and is an external flash which you attach to your camera and you marry them up through your settings, linking them both together. This allows a much higher quality of light, especially in low light settings. It gives a higher quality flash than the built in camera one.
Manual
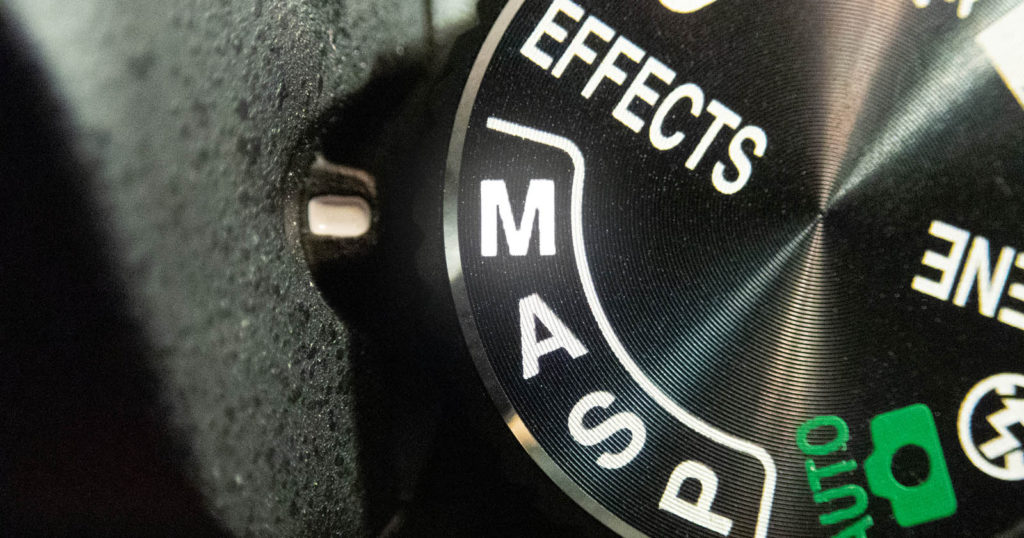
Manual allows the photographer control over their camera. When you look at settings on a camera, usually via a dial, you will see an M. This refers to manual. There’s a lot of settings on a camera, you can use auto, daylight, low lighting and more. However, only manual allows you to make changes to every aspect of your camera.
If you want full control, you will need to put your camera onto manual. Otherwise, you will only be able to make changes to certain elements of your camera. Professional photographers will opt for manual as it has more control over an image and you can be sure every setting is acurate before shooting. It’s good for beginners to get used to manual.
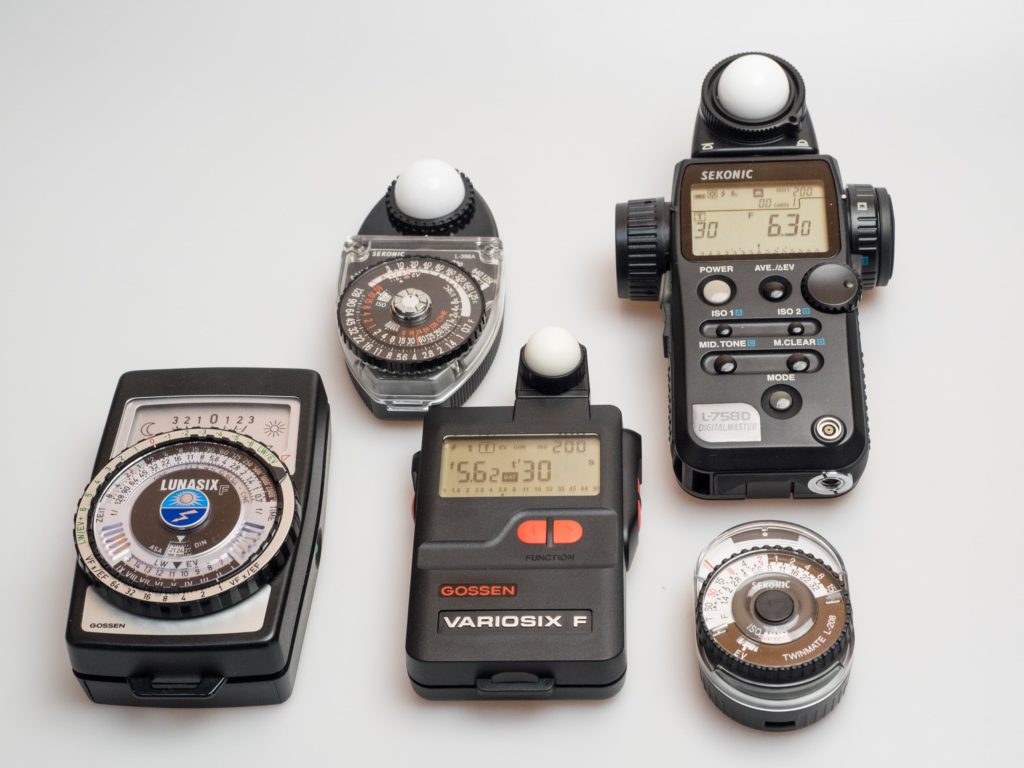
Metering

Cameras have an in-built light meter to help guide a photographer. It will help them figure out what settings their camera should be on. Often if the camera thinks the image is going to be overexposed, it will make alterations to compensate. However, you can also get stand alone meters which allow even more control.
A meter can be handheld. They’re simple devices that pick up the lighting and tones within your landscape or model. They can then relay this information to you as a photographer and you can use it to adapt your manual settings. Often, you’ll put the light meter to your subjects face, take the readings and change your settings to match.
Hopefully these insights will help take away that immediate fear that strikes when people begin talking in photography terminology. There is a lot to learn but the best way to do that is by picking up a camera and trying things out for yourself. There are lots of tips online to get you started, but only you have control over your camera.
