GarageBand is a free digital audio workstation (DAW) developed by Apple, designed to help beginners and professionals alike create music with ease.
Whether you’re an aspiring musician, a podcast creator, or someone who wants to explore sound production, GarageBand is a great place to start. This guide will walk you through the basics of getting started with GarageBand.
What is GarageBand?
GarageBand is a user-friendly software that allows you to record, edit, and produce music or audio projects. It comes pre-installed on most Apple devices, including Macs, iPhones, and iPads, making it accessible to a wide range of users. With its intuitive interface and powerful features, GarageBand has become a popular choice for beginners.
Setting up GarageBand
- Open the app: Locate GarageBand on your Mac or iOS device and open it. On Mac, it’s usually found in the Applications folder, while on iOS, you can access it via the App Store if it’s not already installed.
- Create a new project: When you launch GarageBand, you’ll be prompted to choose a template. Options include “Empty Project”, “Keyboard Collection”, and “Amp Collection”. For beginners, starting with an empty project is often the best choice.
- Set up your audio input: If you plan to record using an external microphone or instrument, ensure your audio device is properly connected. Go to GarageBand Preferences > Audio/MIDI to configure your input settings.
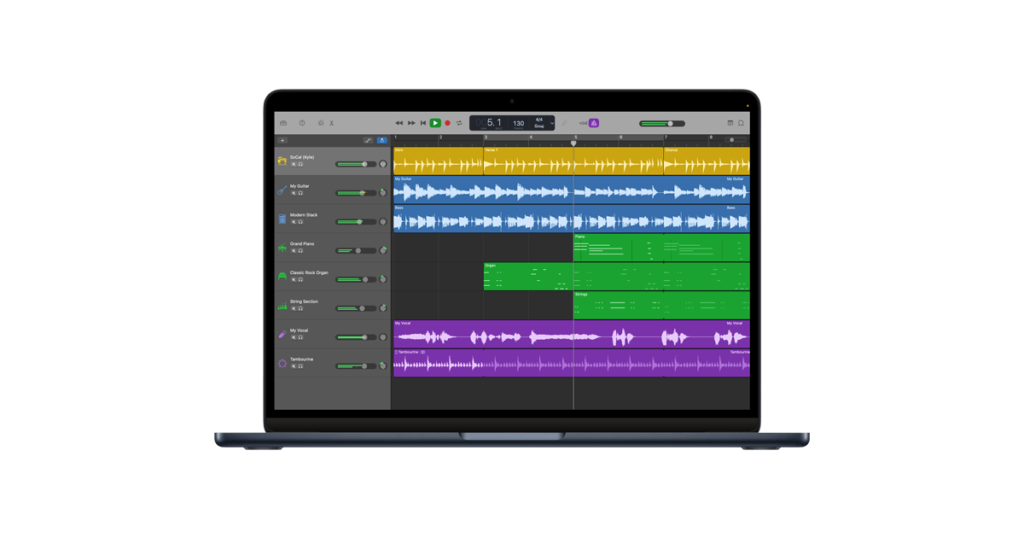
Exploring the interface
The GarageBand interface is simple and divided into key areas:
- Track area: This is where you’ll see your recorded tracks. It works like a timeline, allowing you to arrange and edit audio clips.
- Library: Found on the left-hand side, this contains preloaded sounds, loops, and instruments.
- Smart controls: Located at the bottom of the screen, these allow you to adjust the settings of your instruments or audio tracks.
- Loop browser: Use this to search for and add Apple Loops, which are pre-recorded audio clips you can incorporate into your project.
Recording your first track
- Add a track: Click the “+” icon in the track area to add a new track. Choose between “Audio” for recording vocals or instruments and “Software Instrument” for using virtual instruments like pianos or drums.
- Record your audio: Click the red record button to start recording. Ensure you’ve selected the correct input device and track before you begin.
- Stop and playback: Click the stop button to end your recording, then press play to listen to your track.
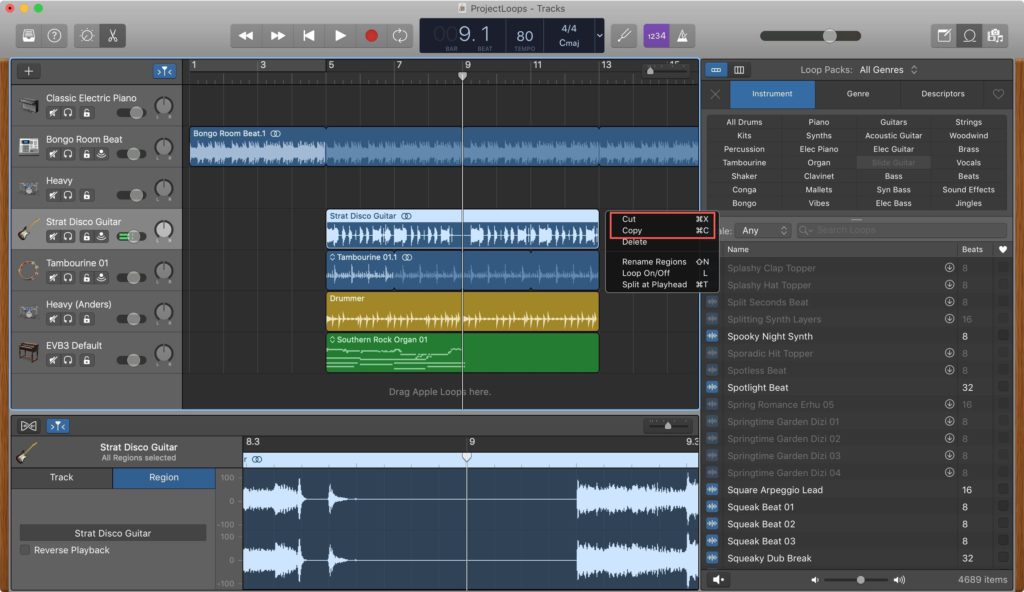
Editing and mixing
- Cutting and moving clips: Use the cursor tool to select and move audio clips along the timeline. You can also trim clips by dragging their edges.
- Adding effects: Open Smart Controls to add effects like reverb, compression, or equalisation to your tracks.
- Adjusting volume: Use the volume slider on each track to balance levels in your mix.
Exporting your project
Once your project is complete, you’ll want to share it. Click on Share in the top menu, then select Export Song to Disk. Choose your desired file format (e.g., MP3 or WAV), set the quality, and save it to your preferred location.
Tips for beginners
- Experiment with loops: Apple Loops are an easy way to add professional-sounding elements to your projects.
- Learn keyboard shortcuts: Familiarising yourself with shortcuts can speed up your workflow.
- Watch tutorials: There are plenty of free resources online to help you master GarageBand’s features.
GarageBand is a versatile and accessible tool for anyone looking to dive into music production or audio creation. By starting with the basics and gradually exploring its more advanced features, you’ll be well on your way to creating polished projects. So, grab your instrument, plug in your microphone, or simply experiment with the virtual instruments – the possibilities are endless!

