You can edit, add and remove URLs in your Fan Links at any time without needing to start from scratch. Read on to find out how.
- Log into your PUSH account, and navigate to the Fan Link tab on the left hand side of your dashboard.
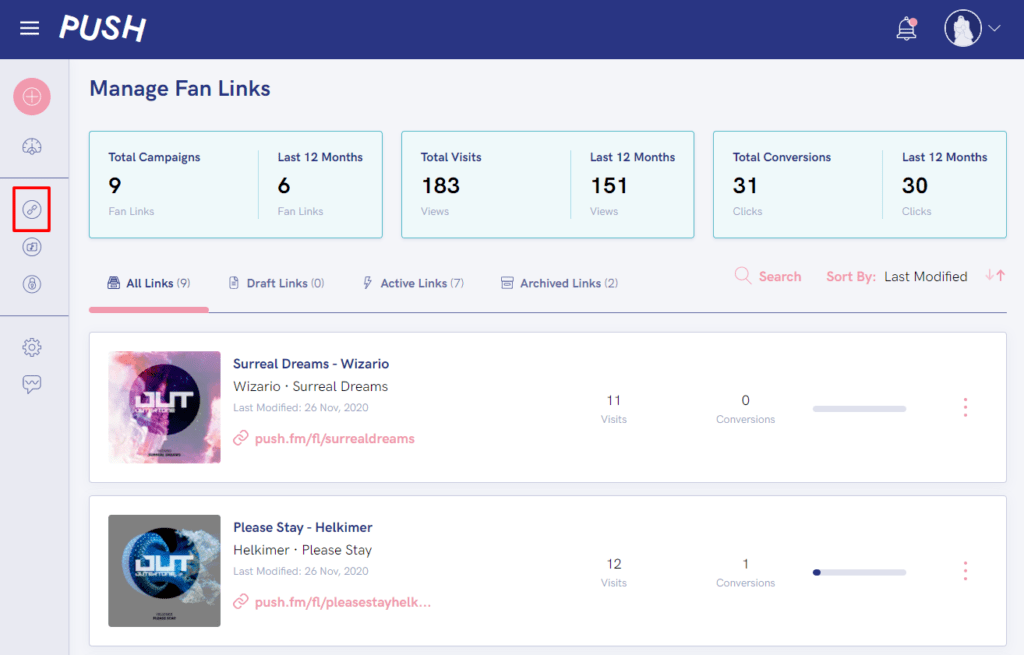
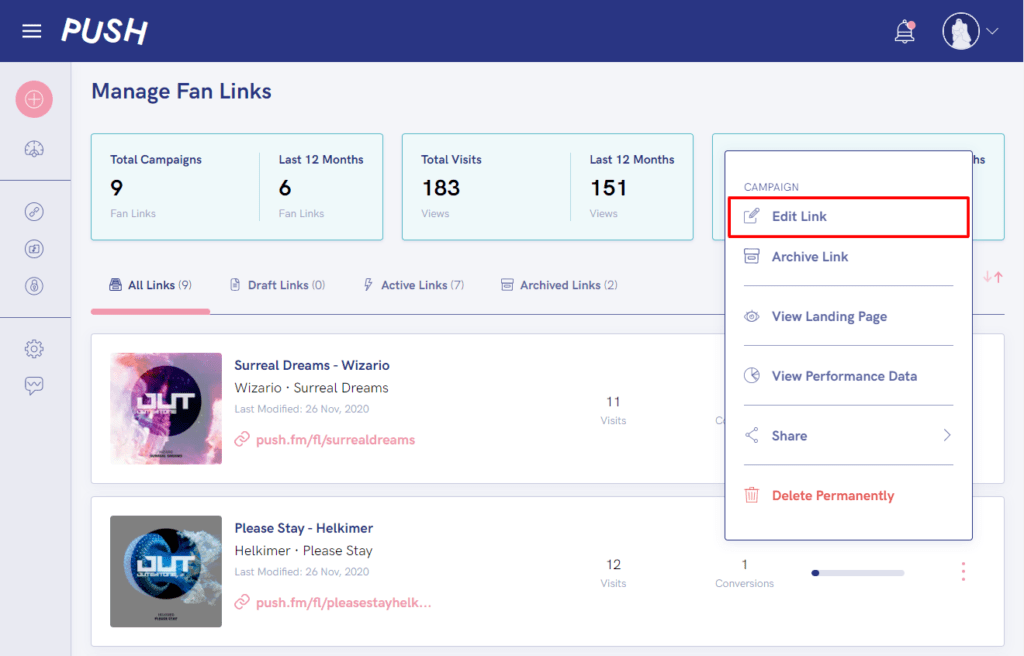
2. Click on the ellipsis menu to the right of your link (the 3 dots), and then select Edit Link.
3. Navigate to Step 3 of the Fan Link process – Select Streaming Services.
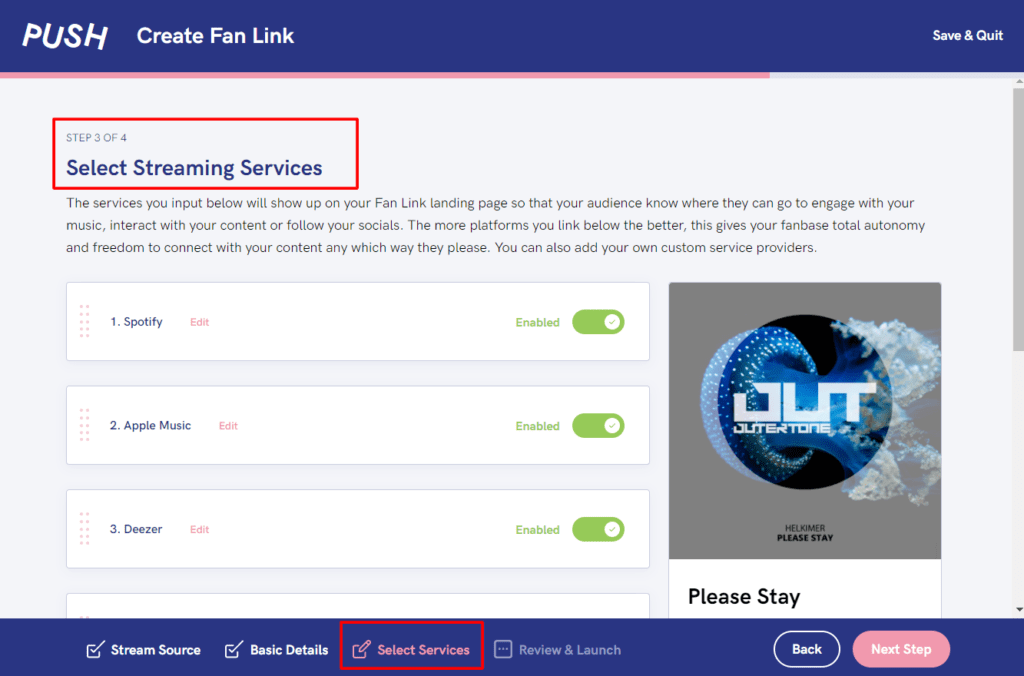
4. If adding a URL to a new platform, scroll to the bottom of this page and click on Add New Service Provider.
If updating an existing platform/store – click on Edit next to the platform you’re updating.
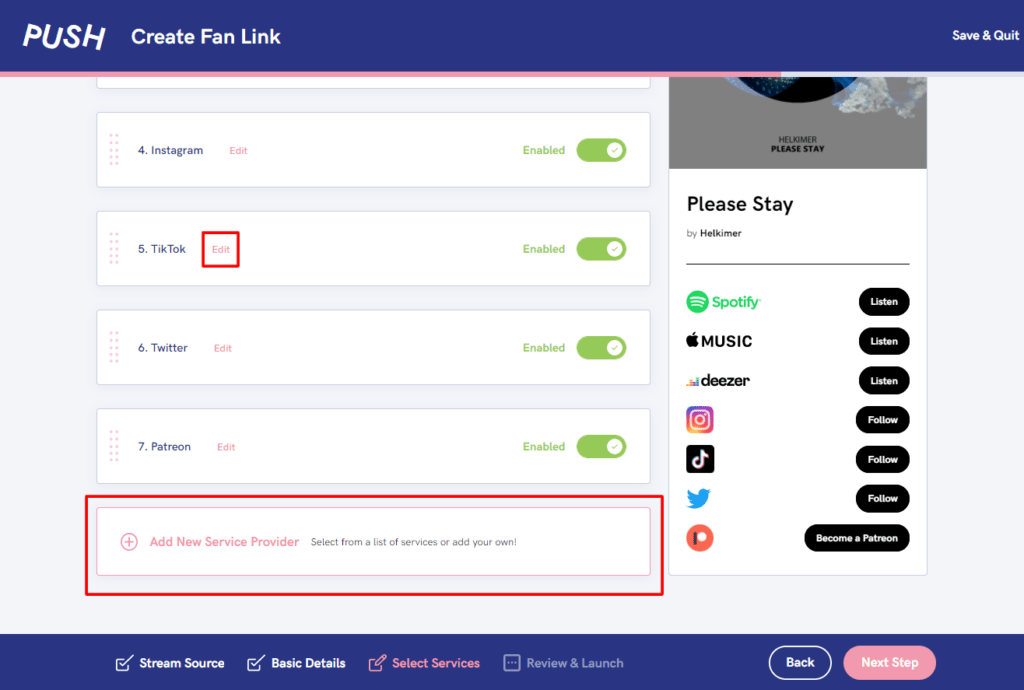
5. Here you can now add in your updated URLs.

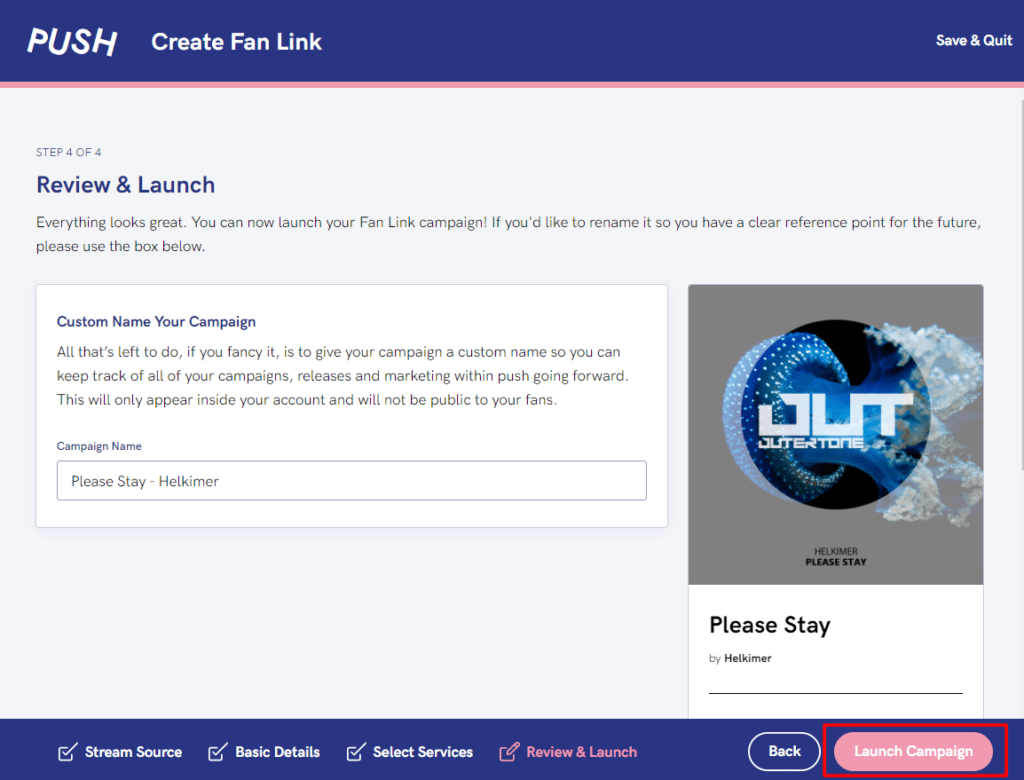
6. Once you’ve added in what you want, click Next Step and then Save Changes to save the changes you have made to your Fan Link.
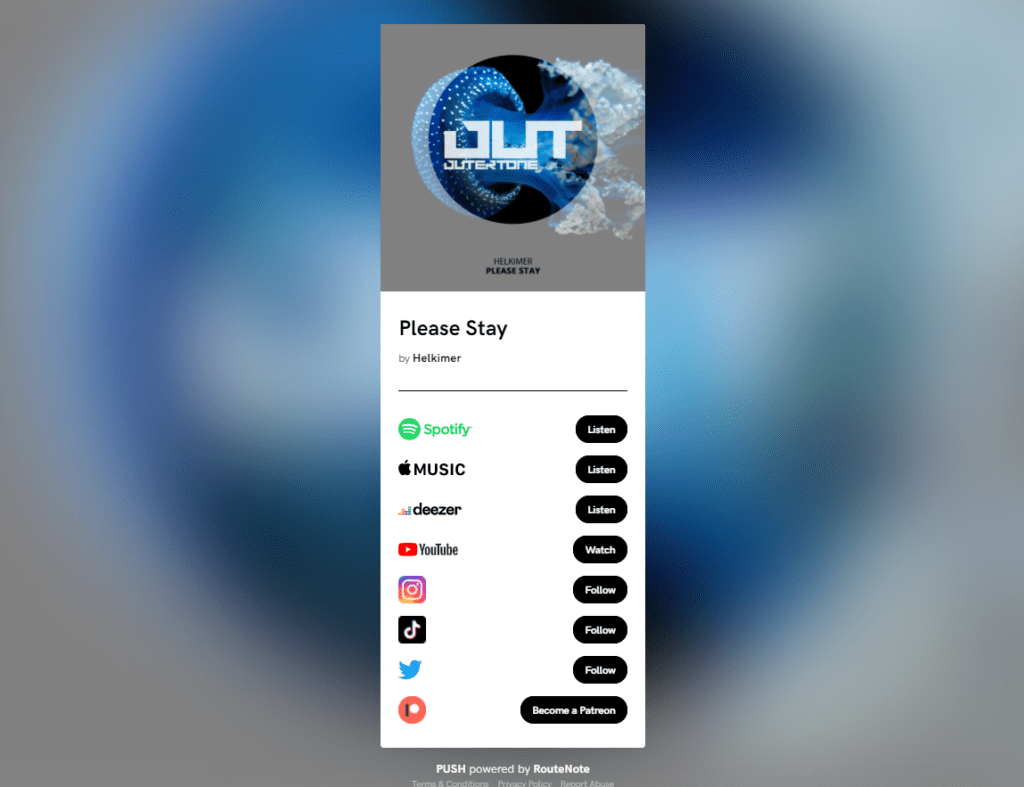
7. Open your Fan Link, give the new URL a test to make sure it works, and you’re done!